
The Quest for Comfortable Power
Last year, I invested in a powerful desktop PC, envisioning deep dives into the world of LLMs and AI. The reality, however, was different. I found myself rarely using this capable machine, primarily because after a day at the office desk, the last thing I wanted was more time in the same posture. My preference leaned heavily towards relaxing in the living room, laptop comfortably on my lap, enjoying the evening ambiance. This created a dilemma: how to harness the desktop’s power without being tethered to the desk?
My initial attempt involved Microsoft Remote Desktop.
It’s a decent tool, offering basic functionalities like text copying and a usable remote coding experience. Yet,
something felt off. The slight input lag, the occasional visual glitches, and most frustratingly, the constant clash
with my ingrained local machine shortcuts made the experience less than ideal. It felt like a compromise. While using
WSL (Windows Subsystem for Linux) directly on my desktop, I realized SSH could offer a more native, integrated
solution.
Enter IntelliJ Gateway: The Best of Both Worlds
This led me to discover IntelliJ Gateway. Think of it as a smart hub that connects a lightweight “thin client” running on your laptop to a powerful backend IDE running on your remote machine (in my case, the desktop). All it requires is a stable SSH connection. This setup promised the perfect blend: the processing muscle of my desktop accessible from the comfort of my laptop, offering a seemingly native development experience. As a significant bonus, offloading the heavy lifting like compiling and indexing dramatically improves my laptop’s battery life – no more spinning fans just to build a project!
Setting Up the Remote Environment
To make this work smoothly, a bit of setup is required on the host machine.
Enabling SSH Access on Windows
While not strictly necessary for Gateway (which will connect to WSL), having direct SSH access to the Windows host itself is convenient for general remote management, offering a lighter alternative to Remote Desktop.
-
Install the OpenSSH Server: Use Windows Settings for Optional Features. The easiest way to find it is by running this command in PowerShell:
powershell ms-settings:optionalfeaturesSearch for and install the
OpenSSH Server. -
Configure the Firewall: Allow incoming connections on the default SSH port (22) by running this PowerShell command as Administrator:
powershell with admin New-NetFirewallRule -Name sshdWin -DisplayName 'OpenSSH Server (sshd) windows' -Enabled True -Direction Inbound -Protocol TCP -Action Allow -LocalPort 22
Installing and Configuring WSL
As mentioned, I rely heavily on WSL for my development environment on Windows. It provides a seamless Linux
experience without the need for dual-booting.
- Install WSL: If you haven’t already, a simple command installs WSL along with the default Ubuntu distribution:
For my purposes, the standard Ubuntu setup is perfectly adequate.
Terminal window wsl --install
Enabling SSH Access within WSL
Now, we need to set up an SSH server inside the WSL environment. This is what IntelliJ Gateway will connect to.
-
Install the OpenSSH Server in Ubuntu:
Terminal window sudo apt update && sudo apt install openssh-server -y -
Change the Default Port: Since the Windows host is already using port 22, we need to configure the WSL SSH server to listen on a different port. Let’s choose
2022. This command modifies the SSH configuration file:Terminal window sudo sed -i -E 's,^#?Port.*$,Port 2022,' /etc/ssh/sshd_config -
Restart the SSH Service to Apply Changes After modifying the configuration, the SSH service needs to be restarted to load the new settings, including the updated port.
Terminal window sudo service ssh restartIf the service wasn’t running before, this command will typically start it as well.
-
(Optional) Check the Service Status You can verify the service is running and listening on the correct port:
Terminal window sudo service ssh status# orss -tlpn | grep 2022
Port Forwarding: Bridging Windows and WSL
The crucial next step is to allow connections coming to the Windows host on port 2022 to be forwarded to the WSL instance.
-
Find the WSL IP Address: WSL gets its own IP address within a virtual network. Find it using:
this will give us an IP address wsl hostname -INote this IP address (let’s call it
<WSL-IP>). -
Set up Port Forwarding: Use
netshin an administrative PowerShell prompt to forward traffic from all Windows network interfaces on port 2022 to the WSL IP address on port 2022:powershell with admin netsh interface portproxy add v4tov4 listenport=2022 listenaddress=0.0.0.0 connectport=2022 connectaddress=<WSL-IP>Replace
<WSL-IP>with the actual IP address you found. -
Allow WSL SSH through Windows Firewall: Create a firewall rule to permit incoming traffic on port 2022:
powershell with admin New-NetFirewallRule -Name sshdWSL -DisplayName 'OpenSSH Server (sshd) wsl' -Enabled True -Direction Inbound -Protocol TCP -Action Allow -LocalPort 2022
Connecting from the Laptop
With the server-side configuration complete, let’s test the connections from the laptop. Assuming my desktop’s main
IP address is 10.100.1.103:
# Connect directly to the Windows host SSH serverssh your_windows_username@10.100.1.103
# Connect to the WSL SSH server via the forwarded portssh your_wsl_username@10.100.1.103 -p 2022
If both connections succeed, you’re ready for the final step.
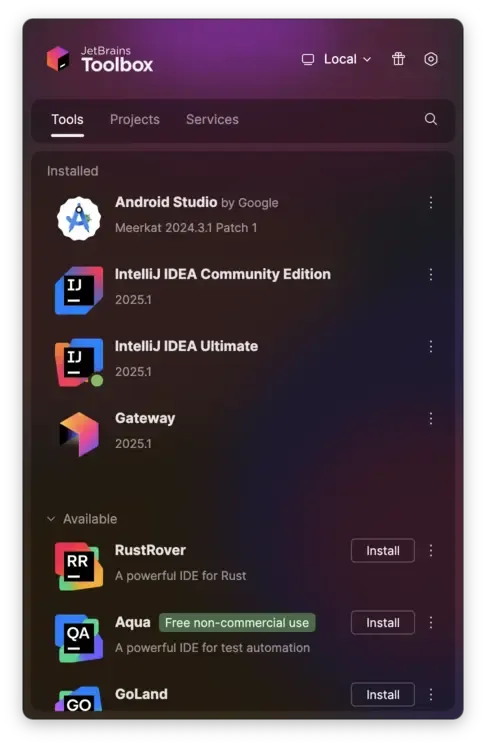
The easiest way to manage Intellij Gateway connections is often through the JetBrains Toolbox.
Install IntelliJ Gateway (it might appear as a separate application or integrated within Toolbox).
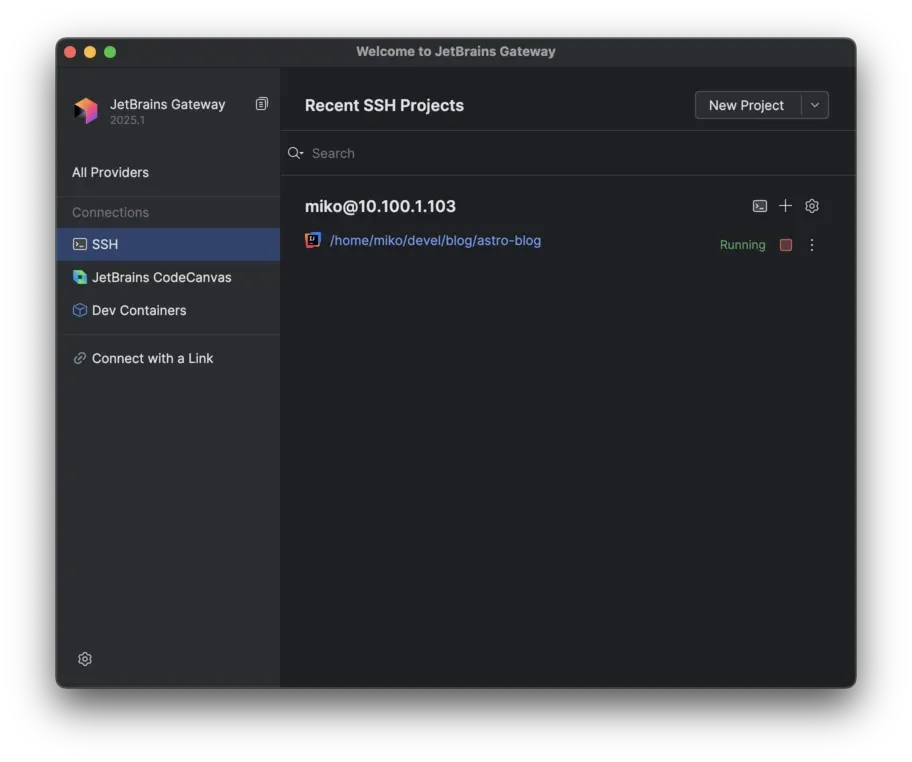
- Launch Gateway and choose the option to connect via SSH.
- Enter the connection details for your WSL instance:
your_wsl_username@10.100.1.103on port2022. - Gateway will guide you through downloading the necessary IDE backend components onto the WSL environment.
- Once connected, you can browse the remote filesystem and select the project directory you want to open.
Upon successful connection and project loading, launching Gateway should present you with your configured host, ready for development.
My Daily Workflow Streamlined
Now, when I want to work on personal projects, the process is remarkably smooth:
- Wake Up the Desktop: My desktop isn’t always on. I use a simple Wake-on-LAN command from my laptop to power it up remotely (replace the MAC address with your desktop’s):
wakeonlan E4:0D:36:54:3D:BE- Ensure WSL is Running: While sometimes WSL starts automatically, I often SSH into the Windows host briefly just to ensure the WSL instance is active:
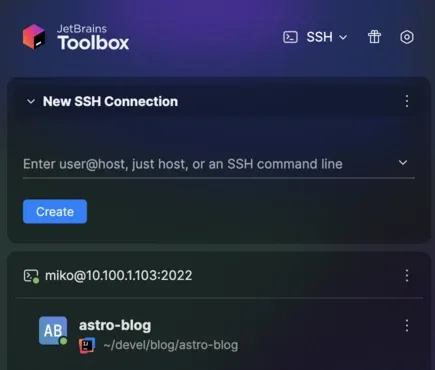
ssh your_windows_username@10.100.1.103 # Enter password if needed # Once logged into Windows via SSH, simply run: wsl # This command starts WSL if it's not running, or attaches to it if it is. # You can then exit the Windows SSH session.- Launch via IntelliJ Gateway or Toolbox: I open IntelliJ Gateway, select my pre-configured SSH connection to the WSL instance, and choose the project. Alternatively, the JetBrains Toolbox allows adding SSH configurations directly, enabling project launch with a single click from the Toolbox interface.
That’s the setup! It bridges the gap between my powerful desktop and my preferred relaxed working style. Hopefully, this detailed walkthrough proves helpful to others (or serves as a handy reminder for my future self).